Preparing Your Diecast Car for Painting
Before you even think about picking up a paintbrush or airbrush, the most crucial step in achieving a professional-looking paint job on your diecast car is thorough preparation. This involves careful disassembly, meticulous cleaning, and proper surface preparation. Skipping these steps will almost certainly lead to a disappointing result, with imperfections showing through and the paint failing to adhere properly. Patience and attention to detail in the preparation phase are the cornerstones of a successful paint job. The time invested here will pay dividends in the final appearance of your model. Remember, a well-prepared surface is the key to a flawless finish.
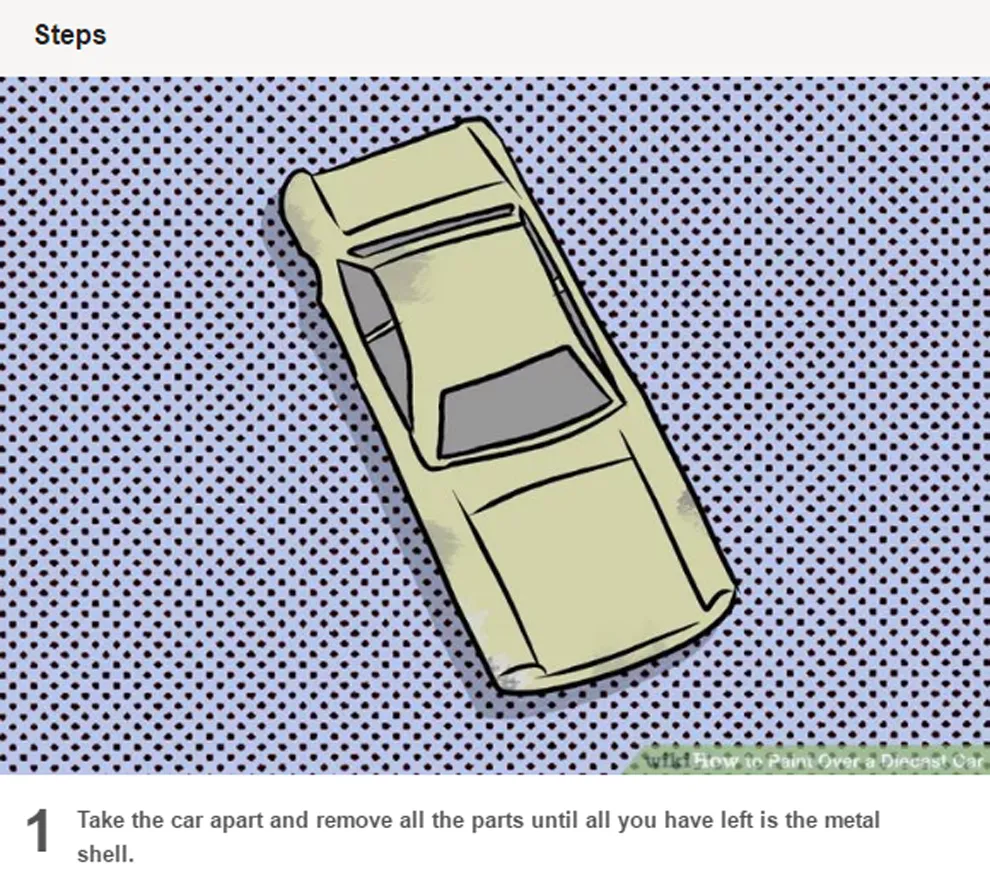
Disassembly and Cleaning
Disassembly is the first step in getting your diecast car ready for painting. This involves carefully taking apart the model to separate the body from the chassis, removing windows, lights, and any other detachable parts. This not only makes painting easier but also allows you to achieve a more professional finish, as you can paint each component separately. Use appropriate tools to avoid damaging the delicate parts. Once disassembled, the components must be cleaned meticulously to remove any dirt, grease, or residue that could interfere with paint adhesion.
Disassembly Process

Start by carefully examining your diecast car. Identify all the screws, clips, and other fasteners that hold the model together. Use a small screwdriver or appropriate tool to remove these fasteners. Take photos during disassembly to help you remember how everything goes back together. Label and store the screws and small parts in a container to avoid losing them. Gently pry apart the components, being careful not to break any fragile parts. Some models may have parts glued together. In such cases, you may need to use a hobby knife to carefully separate them. Patience is essential to prevent damage.
Cleaning Techniques
After disassembly, thoroughly clean each part. Use warm water and a mild dish soap to remove any dirt, grease, or oil. Avoid harsh chemicals that could damage the plastic or paint. Use a soft brush, such as an old toothbrush, to scrub the surfaces gently. Rinse thoroughly with clean water and let all parts dry completely before proceeding. For stubborn grime, you can use a degreaser specifically designed for model building. Make sure to rinse off all the degreaser. Any residue left behind will prevent the paint from adhering properly. Inspect each part after cleaning to ensure it is completely free of contaminants.
Surface Preparation
Once the model is clean, the next step is surface preparation. This involves sanding the surface to remove any imperfections, scratches, or existing paint. Priming the model after sanding provides a uniform surface for the new paint to adhere to. Proper surface preparation ensures that the new paint will adhere smoothly and uniformly, creating a durable and professional finish. Skipping this step will result in a rough or uneven finish, and the paint may chip or peel over time. The quality of your final paint job directly depends on how well you prepare the surface.
Sanding and Priming

Start by sanding the surface with fine-grit sandpaper (e.g., 400-grit or higher). This will remove any imperfections and create a slightly rough surface for the primer to adhere to. Sand in a circular motion and apply even pressure to avoid creating uneven spots. After sanding, clean the model again to remove any sanding dust. Next, apply a primer coat. Primer provides a uniform base and helps the paint adhere better. Use a primer specifically designed for plastic models. Apply thin, even coats, and allow each coat to dry completely before applying the next. Multiple thin coats are better than one thick coat, as they reduce the risk of drips and runs.
Masking Techniques
Masking is essential for protecting areas of the model that you don’t want to paint, such as windows, trim, or interior details. Use masking tape designed for model building, which is less likely to damage the surface. Apply the tape carefully, pressing it firmly to the edges to prevent paint from seeping underneath. Use a hobby knife to trim the tape around intricate shapes. For complex curves, consider using liquid masking solutions. Ensure all areas are correctly masked before painting. Take your time to do it well, as any mistakes will be visible in the final result. Remove the masking tape carefully after the paint has dried completely.
Choosing the Right Paints and Equipment
The selection of paints and equipment is crucial for achieving a professional-looking finish on your diecast model. The type of paint you choose will influence the final appearance and durability of your paint job, while the right tools will make the painting process smoother and more efficient. Understanding the differences between paint types, along with essential equipment like an airbrush or spray can, will help you achieve the best results. The investment in quality paints and equipment pays off in the long run, as it ensures a flawless finish and a more enjoyable painting experience.
Types of Paints for Diecast Models

There are several types of paints suitable for diecast models, each with its own advantages and disadvantages. The best choice depends on your personal preference, the desired finish, and the equipment you have available. Consider the properties of each paint type before making your selection. Factors like drying time, durability, and ease of use should influence your decision. Experimenting with different paint types will help you discover which one best suits your needs.
Acrylic Paints
Acrylic paints are water-based and are a popular choice for model painting. They are easy to clean up with water and have low odor. They dry relatively quickly and offer good coverage. Acrylics are available in various finishes, from matte to glossy. They are generally considered safe to use and are ideal for beginners. However, they may not be as durable as other paint types, and the finish can be prone to chipping if not sealed with a clear coat. Acrylics can be thinned with water or acrylic thinners for use in an airbrush.
Enamel Paints
Enamel paints are oil-based and offer excellent durability and a smooth finish. They are known for their hard-wearing properties and resistance to chipping. Enamels are available in a wide range of colors and are often chosen for their classic look. However, they have a longer drying time than acrylics and require the use of solvents for cleanup. Enamel paints also have a strong odor, so good ventilation is necessary when using them. They provide an excellent, durable finish but require more patience due to longer drying times.
Lacquer Paints

Lacquer paints are solvent-based and offer a high-gloss, durable finish. They dry very quickly and are known for their superior hardness. Lacquers are often the choice for achieving a professional-looking shine. However, they require the use of strong solvents and have a strong odor. Lacquers are also more sensitive to temperature and humidity during application. Proper ventilation and safety precautions are essential when using lacquer paints. The quick drying time makes them ideal for experienced modelers who need a fast-drying, high-gloss finish. They are more complex to use and should be handled with caution due to the harsh chemicals involved.
Essential Tools and Equipment
In addition to paint, you will need a variety of tools and equipment to paint your diecast models. This includes brushes, airbrushes, masking tape, and other items that will facilitate the painting process and improve the quality of the final finish. Investing in quality tools will make the painting process more enjoyable and reduce the likelihood of mistakes. The right equipment can significantly enhance the ease and quality of your work. A well-equipped workstation is a key factor for successful painting.
Airbrush vs Spray Can
Airbrushes and spray cans are two primary methods for applying paint to diecast models, each with its own set of advantages and disadvantages. The choice between them depends on your budget, experience, and the desired level of control. The airbrush gives you more control over the paint application and allows for finer details, while spray cans are easier to use for beginners but may offer less control. Understanding the strengths and weaknesses of each method will help you select the best one for your project.
The Painting Process Step-by-Step

Once you have prepared your diecast car and selected the right paints and equipment, it is time to start painting. This section provides a detailed, step-by-step guide on applying the base coat, applying decals, and adding detail to your model. Following these steps will help you achieve a professional-looking paint job and transform your diecast model. Each step requires patience and precision. Paying close attention to each stage will result in a superior finish that you can be proud of.
Applying the Base Coat
The base coat is the foundation of your paint job. It provides the main color and sets the tone for the rest of the detailing. Applying the base coat correctly is essential for a smooth, even finish. Using multiple thin coats rather than one thick coat is the best approach to avoid drips and runs. Patience and attention to detail are essential. Make sure the primer is completely dry before applying the base coat. Then, apply the paint in thin, even layers, allowing each layer to dry completely before applying the next. This approach will ensure a smooth and consistent finish.
Techniques for Even Coverage
Whether you are using an airbrush or spray can, achieving even coverage is key. For airbrushing, maintain a consistent distance between the airbrush and the model and move the airbrush in smooth, even strokes. Overlap each stroke slightly to ensure complete coverage. For spray cans, use the same method, keeping the can moving to avoid paint buildup in one spot. Apply the paint in thin, even coats. Avoid spraying too much paint in one area, which can lead to drips and runs. Proper lighting is also essential for seeing the coverage. Rotate the model frequently to ensure all surfaces are painted evenly.
Layering Coats

Layering the base coat in thin coats is essential for achieving a professional finish. Allow each coat to dry completely before applying the next. This will prevent runs, drips, and orange peel effects. Apply three or four thin coats, rather than one or two thick coats. Each coat should be a light misting, barely covering the surface. The goal is to gradually build up the color. The final coat should be the most even, achieving complete coverage. Waiting for each coat to dry allows the solvents to evaporate, creating a harder and more durable paint layer. This process is time-consuming, but it is crucial for a flawless result.
Applying Decals and Details
Once the base coat is dry, it’s time to add decals and details. Decals add realism and visual interest. Detail painting brings the model to life. Applying decals and details correctly requires precision and patience. Each step should be carefully done to avoid damaging the paintwork. Taking your time and paying attention to detail at this stage can dramatically enhance the final appearance of your model. The decals, along with the smaller details, bring a unique character to your diecast car.
Decal Application Tips
Decal application requires a steady hand and the right tools. Cut out each decal carefully, trimming close to the design. Soak the decal in warm water for a few seconds to loosen it from the backing paper. Use tweezers to carefully slide the decal onto the model. Position the decal precisely before it dries. Use a soft cloth or cotton swab to remove any air bubbles and press the decal firmly against the surface. Apply a decal setting solution to help the decal conform to the surface and prevent silvering. Finally, once the decals are dry, consider applying a clear coat to protect them.
Detail Painting
Detail painting involves adding small details, such as lights, trim, and interior features. Use fine-tipped brushes and appropriate paints to paint these details. Take your time and work slowly to avoid making mistakes. Use masking tape to protect areas around the details. Steady your hand by resting your elbow on a table. For tiny details, a magnifying glass can be helpful. A good lighting setup will also improve visibility. Detail painting adds realism and character to your model and takes the finish to the next level.
Applying Clear Coat and Finishing Touches
After applying decals and details, the next step is to apply a clear coat. The clear coat protects the paint and decals and gives the model a polished, professional finish. The finishing touches involve any final adjustments, such as polishing and waxing, to enhance the model’s appearance. Applying a clear coat and finishing touches ensures that your hard work is protected and that your model looks its best. The clear coat provides a protective layer that will keep your work protected for many years.
Choosing the Right Clear Coat
The choice of clear coat depends on the paint type you used and the desired finish. Acrylic clear coats are compatible with acrylic paints, while enamel clear coats are suited for enamel paints. Lacquer clear coats provide a high-gloss finish. Choose a clear coat that is compatible with your paint type and offers the desired level of protection. Consider factors like durability and UV resistance. If you want a glossy finish, use a gloss clear coat. For a more subdued look, use a matte or satin clear coat. Read the manufacturer’s instructions for proper application.
Applying Clear Coat Techniques
Apply the clear coat in thin, even coats, just like the base coat. Multiple thin coats are better than one thick coat. Apply a light misting to prevent runs and drips. Allow each coat to dry completely before applying the next. Maintain a consistent distance between the spray gun or can and the model. Ensure good ventilation to avoid inhaling fumes. Make sure the surrounding environment is dust-free to avoid imperfections in the clear coat. The clear coat should provide a smooth and durable finish that enhances the overall look of your diecast car. Always follow the manufacturer’s instructions for best results.
Polishing and Waxing
After the clear coat has completely dried, you can polish and wax the model to enhance its shine and protect the finish. Use a polishing compound designed for model cars. Apply the compound with a soft cloth and gently polish the surface in circular motions. After polishing, apply a coat of wax designed for model cars. This adds an extra layer of protection and enhances the model’s shine. The model’s shine can be further enhanced with a final polishing. Waxing provides a durable barrier against scratches, dust, and UV rays, which makes the car look its best for years.
Troubleshooting Common Painting Issues
Even with careful preparation and execution, painting diecast models can sometimes present challenges. This section discusses some of the most common painting issues and provides solutions for correcting them. Understanding these issues and how to fix them will help you achieve a professional-looking finish and avoid frustration. Always inspect your work after each step to catch any imperfections early on.
Runs, Drips, and Orange Peel
Runs and drips occur when too much paint is applied in one area. Orange peel is a rough, uneven surface that looks like the skin of an orange. To prevent runs and drips, apply thin, even coats, and avoid spraying too much paint in one area. If you notice a run or drip, allow the paint to dry completely, then carefully sand the affected area and reapply the paint. To avoid orange peel, make sure the paint is properly thinned and applied at the correct temperature and humidity. Adjust your spraying technique to ensure even coverage. If orange peel occurs, you can carefully sand the surface with fine-grit sandpaper and then polish it.
Dust and Debris
Dust and debris can ruin a paint job. To prevent dust and debris, paint in a clean, dust-free environment. Ensure the area is free from drafts and airborne particles. If you find dust or debris in your paint, let the paint dry completely, then carefully sand the area and reapply the paint. You can also use a tack cloth to remove any dust particles before painting. Good ventilation can help keep the air clean. Careful planning and attention to detail in the painting environment can greatly reduce the chance of dust-related problems.
Paint Reaction and Cracking
Paint reaction and cracking can occur if the paint is incompatible with the primer or the underlying surface. It can also occur if you apply too many coats too quickly. To avoid paint reaction, use paints and primers from the same manufacturer and ensure they are compatible. Allow each coat to dry completely before applying the next. If you experience paint reaction or cracking, you may need to strip the paint and start over. Ensure proper surface preparation before repainting. Also, make sure that each coat is applied in the proper order and the paints used are compatible with each other.